MY Blue Route Adventures & Sailing Stories – Episode 1
➡️ Watch Complete Video – The Blue Route Movie Adventure ⬇️ Click Here ⬇️

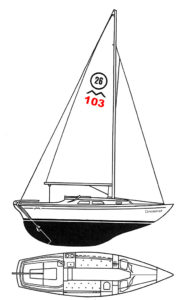
Hello Sailing Folks,
Thanks a lot to join this my sailing lifestyle and sailing videos blog in those years, during the restoration of Dreamer and her sailing days. I spent a very nice time and now is arrived the moment to say goodbye to my small creature, and leave her to sail away in a new adventures…
SO…I’m very happy to announce that Dreamer has a new owners: Esteban & Liliana.
They will bring back Dreamer to Portugal by truck (as she come to me 5 years ago completely ruined by a previous barbarian owner..) and sail her to his new homeport:
Las Palmas – Isle of Canaries.
Probably Dreamer is the Marieholm26 make more miles by sail and by land of all boats made by Marieholm Bruck Shipyard. She is a piece of history.
Thanks Dreamer to share with me these fantastic years and keep me safe inside you.I never forget any moment spent with you and you will be forever in my heart!
Fair winds small creature you belong to the big ocean!!
Ciao a tutti,
Eccomi qui per illustrarvi il problema che mi si è presentato in questi ultimi due mesi impedendomi di veleggiare ..stagione finita!!
Il mio bel Volvo Penta 2001 dopo essere stato rifatto completamente 3 anni fa ha cominciato a presentare problemi di pressione alta..eh eh ..infatti l’olio ha cominciato ad uscire dal fondo della coppa dell’olio grazie al fatto che la tenuta del parataolio risulta difettosa a seguto della troppa pressione.
Per risolvere questo problema ho dovuta fare una leggere modifica al motore, collegando al tappo dell’olio un tubo di gomma che porti fumi e pressione fuori.
Ottimo risultato ..eccetto il fatto che prossimamente dovrò sbarcare il motore per la terza volta per cambiare il paraolio.E la vita….
Hello!
Here the easy solution to deal with high oil pressure after rebuild my Volvo Penta 2001 and after rectify his piston. For sure I will must lift out the engine and change the rubber seal inside engine after a failure of it due the high pressure inside crankcase. Any comment welcome! Watch Sailing Adventures on YouTube!
Salve,
mi chiamo Gabriele e dopo 3 anni di continui restauri e upgrade “Dreamer” un Folkboat Marieholm 26 in versione crociera è in vendita! Si presenta in splendida forma pronta per un nuovo affidabile proprietario. La barca e’ stata ristrutturata per navigazioni impegnative offshore, o per navigazioni costiere, barca sicura dove vi sentirete ben protetti nel profondo pozzetto anche nelle condizioni più’ difficili.Barca con ottima stabilità di rotta! Dreamer e stato rifatto completamente senza stravolgere il design originale gia’ esso perfetto, ricreando il calore degli interni e la luminosità’ con un perfetto connubio di teak del Burma e cuscineria e rivestimenti bianco panna in tessuto antimacchia lavabile. Quasi tutto e´ stato rifatto eccetto alcuni particolari in teak originale che ancora si presentavano in ottime condizioni. Sprayhood, cagnaro, copri-randa copri-passauomo copri-barra fabbricato in Sumbrella. Barca praticamente stagna e asciutta. Nessuna goccia d’acqua penetra all’interno grazie a tutti gli oblò’ vecchi sostituiti nel 2013 con gli originali Ertec Made in Denmark (vetro grigio oscurato) e al lavoro certosino di impermeabilizzazione dei fori passanti della ferramenta di coperta utilizzando il Butile made in USA.
Il mio motto e’: L’acqua deve stare fuori!!!
Tutte le Luci di via e faretti interni (Batsystem) a LED. La barca, inutile dirlo, naviga in maniera impeccabile in tutte le condizioni meteo dando un senso di sicurezza e stabilita’. Il timone a vento Windpilot Pacific Light sara’ un ottimo aiuto e compagno quando vorrete riposarvi o mangiare durante le traversate, Rig Selden, sartie, paterazzi nuovi (2012/2015) il tutto ancorato alla barca su nuove lande in inox 316L da 8 mm..Praticamente Indistruttibile! Scafo completamente privo di osmosi e testato annualmente cm dopo cm da me stesso con strumento Electrophysics CT-33 per misurare l’umidità’.
ECCO UNA BREVE LISTA:
La lista dei lavori fatti e’ lunghissima, sarò felice di rispondere a ogni Vostra domanda in modo preciso… Scrivete!!!! infatti se dovessi elencare tutto quello che e´’ stato fatto, cambiato, aggiunto ci vorrebbe una lista di 20 e più’ pagine..per questo motivo ho infatti provveduto in questi anni a mantenere aggiornato il sito in cui ora state navigando con foto dei particolari.. Per un totale di 1750 foto/video !! Queste vi daranno sicuramente molte informazioni per poter giudicare Dreamer e i lavori fatti, sara’ mio piacere esaudire ogni vostra curiosità’ scrivendo un una e- mail Se invece preferite vedere di persona Dreamer sarete i sempre ospiti benvenuti.
Se volete Contattarmi via email, whatsapp, sms:
DREAMER E’ APPARSO SU BOLINA ECCO UN ANTEPRIMA DELL’ARTICOLO:
olete saperne di più riguardo al folkboat? Un buon punto di partenza e il famoso libro di John Vigor: Twenty Small Sailboats to Take You Anywhere , ovvero le 20 migliori barche con cui potete andare dove volete tra cui Dreamer!!
e….se volete sognare con un documentario fatto da un amico Australiano che a girato il mondo con un folkboat Vi consiglio di cuore :

Hello!
My name is Gabriele and after 3 years of continuous restoration and improvements Dreamer my Marieholm 26 folk boat cruising version is for sale! She is in great shape ready for a new owner. It has been renovated for offshore sailing, all was changed without distorting the original design already perfect, recreating the warmth and brightness of the interior with a perfect blend of Burma teak and white cream cushions and upholstery fabric stain resistant washable. Almost everything was remade except for a few details that still in original teak is presented in excellent condition. Spray hood, hatch covers mainsail cover, cover bar are manufactured in Sumbrella. The Boat is waterproof and virtually dry. No drop of water gets inside thanks to all new portholes the original Ertec Made in Denmark (obscured glass gray) and the painstaking work of sealing the holes for the deck hardware using the Butyl Made in the USA . My motto is’: The water should stay out! All the navigations lights and interior lights (Batsystem)are LED. The boat, needless to say, navigating very well in all weather conditions giving a sense of security and stability . The Windpilot Pacific Light will be ‘a great help and companion when you want to relax or eat during the crossings. The whole rig are Selden, All Shrouds, forestay and backstay new (2012/2015), all anchored to the boat on new chainplates and fittings in 316L stainless steel 8 mm .. Virtually Indestructible! Hull completely free of osmosis and tested from myself annually cm after cm Electrophysics CT-33 instrument for measuring the moisture.
HERE IS A SHORT LIST:
…The work list is very long, I’ll be’ happy to answer your every question accurately … Write!! In fact, if I had to list everything that was done, changed, added, it would take a list of 20 and more pages .. for this reason I had uploaded 1750 photos/videos with all the worksI did in those recent years These will surely give you a lot of information in order to judge Dreamer and the work done, and will be my pleasure to fulfill your every curiosity’ writing an e-mail, If you prefer to see Dreamer you will be a guests always welcome.
Here the email and mobile phone for contact me whatsapp, sms:
Dreamer is registered in Belgium and the passage of property are easy and painless … For a Italian buyers … many fewer problems!
DREAMER ON THE FAMOUS MAGAZINE BOLINA:
If you want have a dream, open eyes and watch a documentary made by a friend from Australia who sail aroun the world with Folkboat I recommend:
If you want to know more about the Folkboats a good starting point is the famous book written by John Vigor: Twenty Small Sailboats to Take You Anywhere (including Dreamer!!)
Infatti come da titolo..mai dire mai!!
Ecco la storia:
Quest’anno uno dei lavori da fare schedulati era il cambio del premistoppa Volvo.
Io e Andrea abbiamo smontato l’asse per togliere quello vecchio e inserire quello nuovo…
e voilà! Sorpresa di Pasqua… Asse e astuccio non allineati!!! Infatti ora mi spiego perché ogni tanto sentivo dei colpetti quando spostavo la barra a dritta.
Soluzione…. DRASTICA!!! Sbarcato il motore per la 2 volta!! Accidenti.
Tolto il tutto e bonificata la zona dell’astuccio dell’elica con resina e stucco epossidico. Ho provveduto inoltre a ri-dipingere la sentina
Prossima Settimana provvederò al corretto allineamento dell’asse con il motore…
tutto questo per risolvere un lavoro fatto da cani dal precedente proprietario.
Il bello di tutto cio’….. il motore non ha più segreti per me…
Indeed as title..never say never !!
Here’s the story :
One of thing to do scheduled was change the Volvo stern gland.
Me and Andrea start to remove the propeller shaft for easy fitting of the new glande but.. voila ! Easter Surprise …propeller shatf non-aligned with the glande !!!
In fact, now I’ll explain why in a while, I felt a “Toc Toc” was moving the bar to starboard . Drastic solution …. !!! take out the engine for the second time !! Damn It. Removed all the stuff and fix all’area of the box and propeller with resin and epoxy. I repaint all the bilge too…
Next ALIGNMENT Axis and the engine … this for resolving a “SH…” work made from the previous owner .
The good thing is ….. the engine has no more secrets for me..



Ciao a tutti,
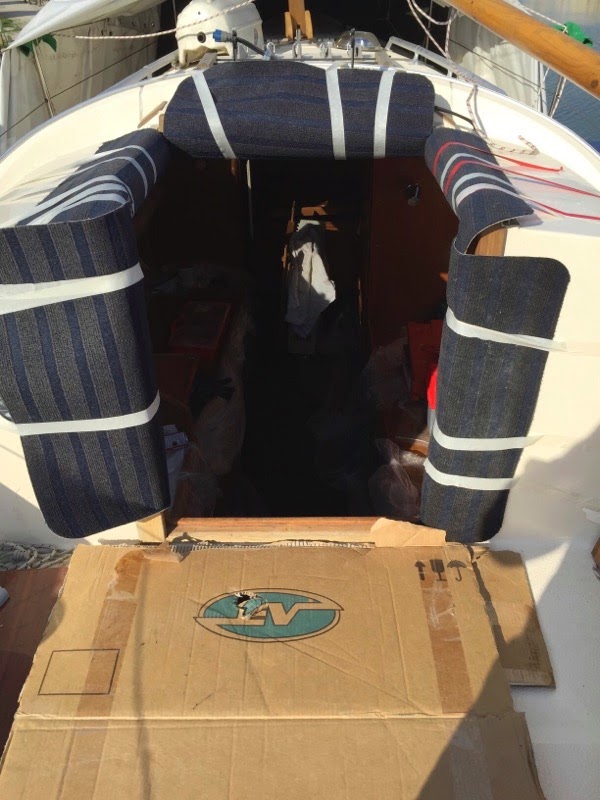
ieri mi sono deciso di risolvere un piccolo problema sulla tuga vicino alla base dell’albero,
ovvero un vecchio foro troppo grande per il passaggio di un cavo e in una posizione delicata ovvero il supporto dell’albero.
Ho utilizzato il tondino di acciaio con grasso di vasellina (per evitare l’incollaggio) e resina epossidica addizionata fibre minerali per isolare, irrobustire e per creare un foro di diametro corretto e inclinato in modo che il cavo elettrico non si pieghi a 90 gradi nel passaggio dentro in barca,
Ecco la successione del lavoro.
Hello everyone,
yesterday I decided to solve a small problem on the deck close the base of the mast. A old hole, too large for the passage for only one electric cable in a delicate position over the support of the mast. . I used a steel rod with vaseline grease ( to avoid to be glued) and epoxy putty with mineral fiber to make an inclined hole, this to avoid , inserting the cable, it folds to 90 degrees in the inside passage by boat , Here is the sequence of work .
Ecco A voi il lavoro finito!
Here for you the end of the work!
Salve,
finiti i lavori di resinatura ho rimontato tutta la parete tappando i vecchi fori delle viti con cunei di legno e resina epossidica e ri-forato tutto in modo da aver piu’ tenuta delle viti che sorreggono il tutto.
Ho inoltre rifatto in un unico pezzo di teak il supporto reggi schienale adattandolo in maniera decisamente più elegante e precisa dell’originale vecchio di 30 anni e forato come un colapasta. Cambiati inoltre i cavi elettrici dell’albero e sistemato tutte le luci.FATTA!!
Hello, finished to epoxy I remounted whole wall plugging the old screw holes with wooden wedges and epoxy and re – drilled everything so the screwhave held more all stuff . I remade also, into a single piece of teak, the back support adapting it, more elegant than the the original 30 year old drilled like an colander!! Changed also all the electric cables inside the mast and fixed everything!! DO IT!!!!
Salve, oltre aver risolto definitivamente il problema della delaminazione ho risolto e ottimizzato il sistema di appoggio schiena nella dinette di Dreamer. Ho inoltre cambiato pezzi di teak originali tagliati in maniera grossolana, sostituendoli con nuovi esteticamente piu’ belli…perfezione totale!!!
Hello,
having finally solved the problem of delamination I solved and optimized the back support in the cabin of Dreamer . I also changed some original pieces of teak cut crudely , replacing them with new aesthetically more beautiful … total perfection !!!
Oggi finalmente ho sistemato quella zona circolare di circa 10 cm delaminata sul passavanti di dritta. Ecco la prima serie di foto della prima parte del lavoro,
Dopo aver ben controllato dov’era la de-laminazione ho smontato gli interni e scollato il rivestimento in modo da avere la zona libera da tagliare.Vi chiederete il perche’ intervenire da sotto?! Per non rovinare la stampata antisdrucciolo della coperta.
Today I finally fixed the circular area of about 10 cm of delaminated on the decks – starboard side . Here is the first set of pictures of the first part of the work. After getting well checked where was the delamination I disassembled the interior to get a free zone to be cut. You will ask.. why work inside…? to avoid ruin the no slipping deck molded.
Ho utilizzato il Fein Multimaster per un taglio pulito lungo circa 42 cm per 7 di larghezza con bloccalama fissata a 5 mm
I used the Fein Multimaster for a clean cut long about 42 cm to 7cm wide
with blade lock set at 5 mm
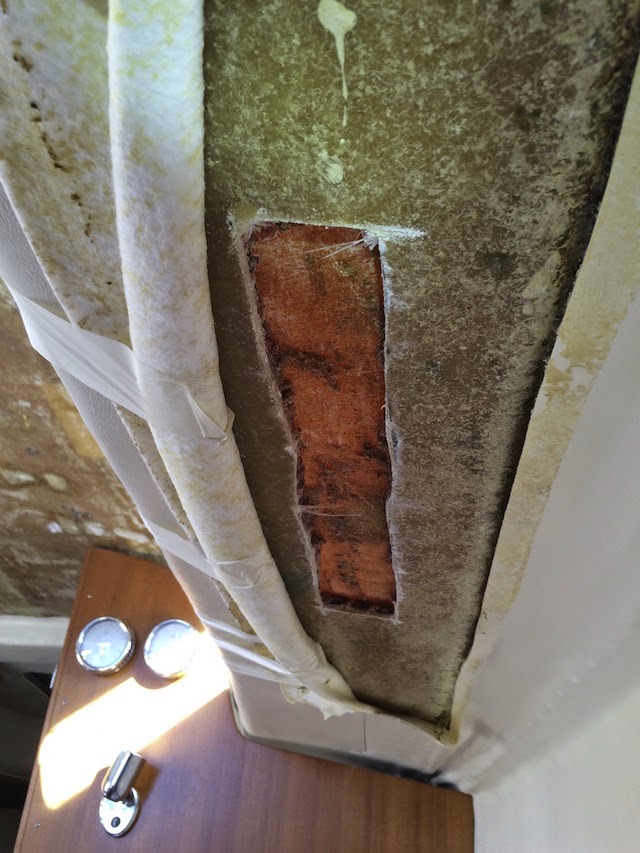
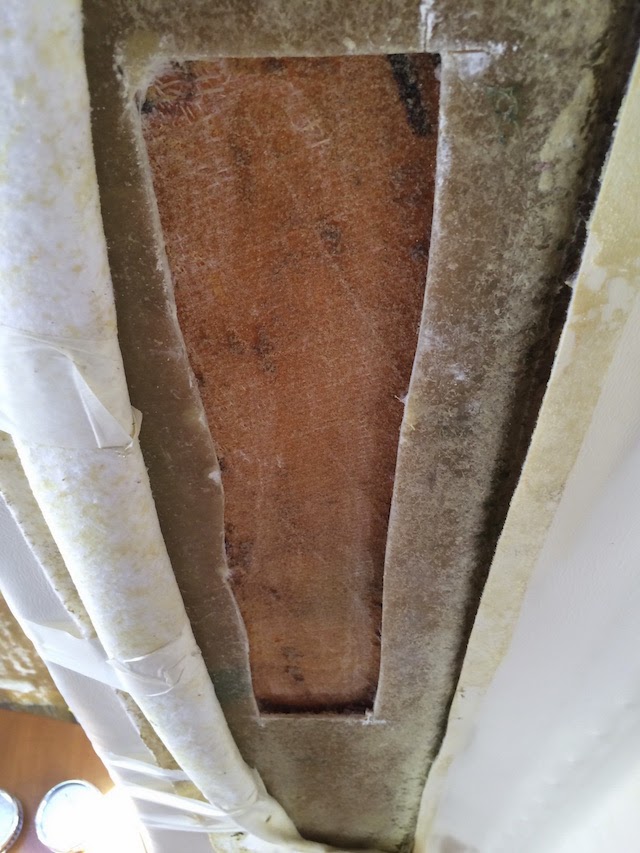
Il sandwich pensavo fosse legno invece si tratta di qualcosa tipo dynacell…spessore totale tra il primo strato interno e il secondo 13mm…
The sandwich I thought was made by wood and layer of resin instead it is something like … Dynacell Total thickness between the first and the second inner layer 13mm …
Ho fatto iniezione di resina epossidica e fibre minerali tutt’attorno per aumentare la solidità..
I did injections of epoxy + mineral fiber to reinforce all around..

Compensato marino alta qualità..
Plywood high quality..
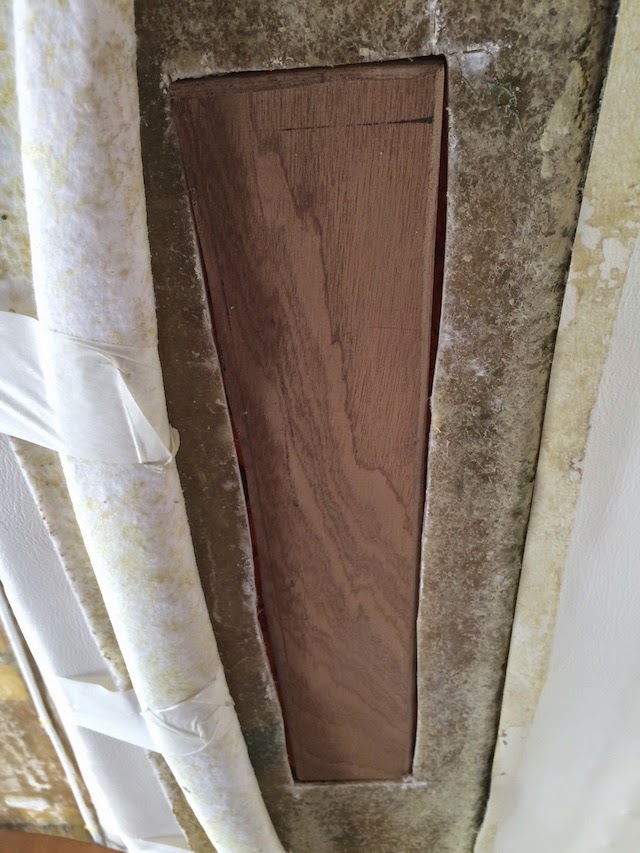
Addensato la resina epossidica con fibre minerali tipo stucco..
Thickened epoxy with mineral fiber..

Compresso in tutto con 40 kg di piombo sulla coperta…
Compressed all with 40 kg of lead on the deck..
Laminato il tutto con epoxy + fibre minerali, circa 15 strati tra matt e tessuto.
Visto che la forza di gravita giocava contro di me, ho preferito laminare in 3 tempi.
Usando epoxy invernale con tempo e temperatura di utilizzo calibrato per i mesi freddi, con temperatura in barca di circa 25 GRADI, la resina cominciava a catalizzare dopo circa un ora. appena catalizzava partivo con lo strato successivo. per evitare bolle e future delaminazioni con il rullo frangibolle accuratamente pressavo il tutto.
Laminate all with epoxy resin + mineral fiber , about 15 layers of matt & tissue… the force of gravity was playing against me , I laminate in 3 times . Using winter-epoxy (with reaction calibrated for the cold months), with temperature inside the boat of about 25 DEGREES , the resin was beginning to catalyze very soon . Just catalysed I start with the next layer. To avoid bubbles and future delaminations i used a roll to squeeze the material.