Veleggiando in Relax – Lazy Sailing

Finalmente dopo mesi di pioggia il weekend ci ha regalato il sole… Dremer scalpitava per spiegare le vele e dimostrare la riconoscienza della mia cura nel renderla perfetta!! E vai due giorni di bordi con 12/15nodi di vento con Willy (il timone a vento) che faceva il suo dovere e io a rilassarmi in prua.. off course con il mio AIS attivo!!

Finally after months of rain, the weekend gave us the sun … Dremer was happy to demonstrate how happy she is for all the care in making it perfect! And go!!! With two days of wind with 12/15 kn  and with Willy (the windvane) at the helm (he did his duty very well)  I was very lazy ..  .. off course with my AIS active!


Con grande Onore Vi presento… I present you with Honor…

Ciao a tutti!! Ho avuto l’onore di essere contattato via mail dalla Svezia dal Sig. Joakim che si e complimentato con me per i lavori eseguti su Dreamer con richeste e scambi di consigli, premetto che di mail ne ricevo molte e ringrazio tutti i miei follower per il supporto, questa volta pero’ la soddisfazione e stata doppia dato il fatto che Mr. Joakim è il figlio del proprietario dei cantieri Marieholm Boat AB ovvero Mr.Lars.
Ecco a Voi le foto che Joakim mi ha inviato davanti alla loro M26 “Settanta”.
Grazie Joakim and Lars!!!

Hello to all! I was honored to be contacted via email by Mr. Joakim from Sweden that has complimented me for the work made on Dreamer with exchanges of advice, I get a lot of email and I thank all my followers for the support, but this time satisfaction was twice given the fact that Mr. Joakim is the son of the owner of the shipyards Marieholm Boats AB:  Mr.Lars.
Here’s to you the photos that Joakim sent me with He and Lars in front of their M26 call “Settanta”
Thanks Joakim and Lars!


IMG_0515

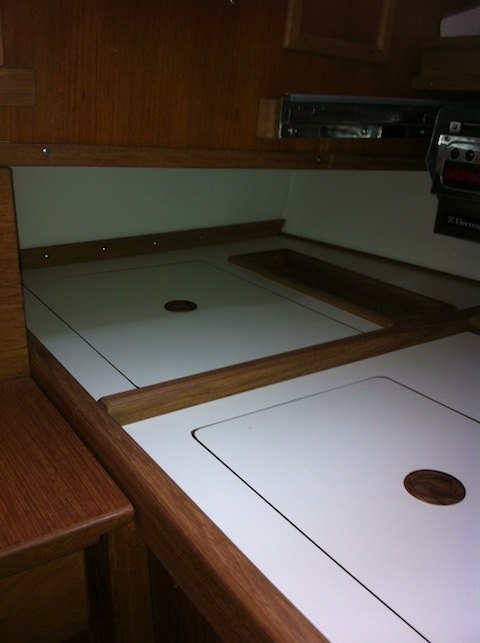
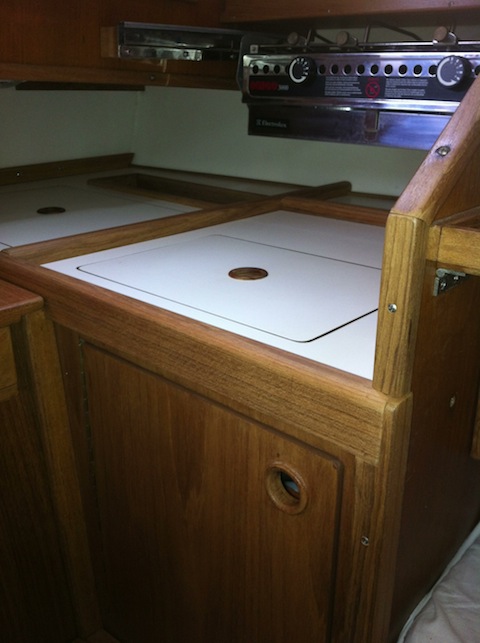
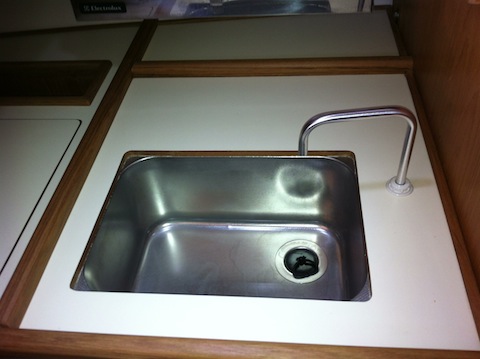
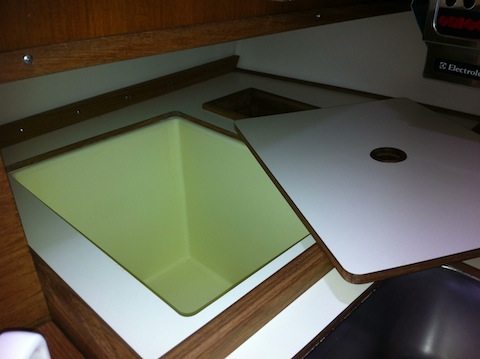
Ecco a voi…la nuova cucina! Finally… the new galley!

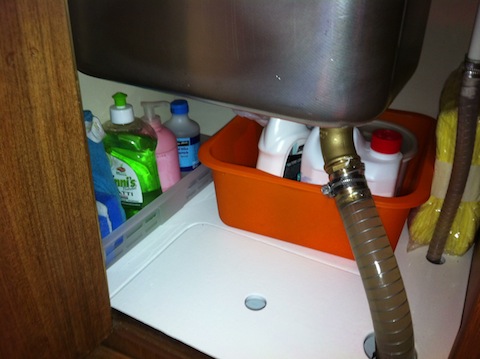
Ecco a voi finalmente la nuova cucina. Con il mitico Piero in una settimana siamo riusciti a finirla e montarla. Il risultato secondo me è eccellente. Ho curato molto i particolari e la funzionalità aggiungendo alcuni particolari utili durante il suo utilizzo in navigazione.
comunque ecco a voi le foto dell’opera finita. Altre foto le trovate nella galleria fotografica!

Here ..finally the new galley. With the legendary Piero in a week we were able to finish it and mount it. The result in my opinion is excellent. I edited a lot of the details and the feature by adding some useful details during its use in navigation.
However, here comes the photo of the finished work. More photos in the photo gallery!


IMG_1714


IMG_1715


IMG_1717


IMG_1718


IMG_1721

Lavori Parte 2° – Works Part 2°

Ciao! I lavori proseguono, e stata staccata dallo stampo la ghiacciaia! Perfetta. Ecco le foto.
P.s. Se a qualcuno interessa cambiare la sua vecchia ghiacciaia con una nuova scrivetemi.

Hello, works still going on.. here the new icebox just out the mould. Anybody interest to get one to change the old one I can made it in any color. Please let my know.


IMAGE_A7B6FFBE-10B9-42F9-9E44-49AF7DF210C0


IMAGE_23C54076-9205-4A57-B2F5-4E9AF67CA893


IMAGE_A8920D50-3DC4-4AD5-9A84-9BA4118B89FD


Sbagliando si impara..A big mistake..

Ultime novita’? Molte! Ma ve le faro’ sapere nei prossimi post.
Quella che ora mi accingo  a descrivervi si puo’ considerare forse il mio piu’ grande errore!
L’anno scorso nella foga del’creare qualcosa di unico mi sono concentrato nel costruire la cucina/lavandino e ghiacciaia di Dreamer in Corian. Il risultato eccellente,bello sia al tatto che alla vista ma…si e rivelato fallimentare in fatto di peso.
Il Corian utilizzato per fare il piano cucina/ghiacciaia/lavandino era da 12mm con un peso di 22kg al metro quadro e in Dreamer ne ho usato 2,38 MQ!!.. Totale: 40 kg sopra la linea di galleggiamento…. et voila’ barca leggermente inclinata..
Ho resistito un anno e dopo molti tentennamenti ho deciso…via tutto e rifare!!
Per cui con il mitico Piero al porto in soli 15 minuti abbiamo smontato cucina e ghiacciaia (conosco Dreamer come le mie tasche incluso il passo di ogni singola vite…).
Il nuovo progetto è già in corso e vi terrò informati con le varie foto  del nuovo capolavoro con peso totale 12 KG!!! (Ghiacciaia fatta in carbonio…..eh eh eh!!)

Latest news’? Many  in the next post … but what I am about to describe to you now is my my most big mistake .. and now I’ll explain.
Last year, in the boom of create something unique I focused in making the galley including icebox/sink etc  made by Corian. The result was excellent and nice to the touch and look fabulous but.. it proved unsuccessful in terms of weight.
The 12mm Corian used  weighs 22kg for  meter square and I used 2.38 MQ to do it! .. total: 40 kg above the waterline …. et voila boat tilted slightly ..
I lasted one year, and after much hesitation I decided to re-make everything …!
So I went to the harbour with the legendary Piero and in 15 minutes we dismounted kitchen and icebox (I know Dreamer Like my pockets including the step of every single screw …).
The new project is already underway and will keep you informed with the various photos of the new masterpiece with total weight 12 KG! ( ..Icebox made by carbonfiber……. eh eh eh!)


Nuove Vele, Dreamer Pronto !!! New sails Dreamer is ready to go!

Ciao,
Dreamer ora si trova nel suo ambiente naturale… l’acqua salata. giovedi 12 Aprile abbiamo l’abbiamo rimessa in acqua. Manca solo la pulizia della coperta che faro’ questa settimana.
Ecco a voi le foto con le vele nuove… Perfette!! Grazie a Roberto e Gianni della ULLMAN SAIL che hanno lavorato in maniera sublime.

Hello,
Dreamer is now in its natural environment … salt water. Thursday April 12 we we put in the water. Only one thing is missing …. cleaning the deck!
Here’s photos with the new US sails … Perfect! Thanks to Roberto, and Gianni of ULLMAN  SAIL who have worked in a sublime way.


Nuovo serbatoio per il diesel – New diesel Tank

Ciao a tutti… come promesso ecco le foto del nuovo serbatoio del carburante. Leggermente piu’ grande ma con la stessa circonferenza e sopratutto con il livello del carburante.Finalmente vedro’ visivamente la “riserva”. Costruito in acciaio e colorato a caldo, un ottimo lavoro eseguito a regola d’arte regalatomi da  Enrico il proprietario delle Industrie Scardellato ! Grazie Enrico!!!

Hello… as promised.. here are the pictures of the new fuel tank. Slightly more big but with the same circumference and especially with  fuel level. Finally I will  see how much fuel I got in the tank without mentally calculation speed/hour. It is  made by steel  and oven colored. A great job well done! It is a present from Enrico, the owner of Industries Scardellato! Thanks Enrico!

Brutto tempo…bene rinforziamo Dreamer! Bad weather.. I make Dreamer more strong!

Visto il tempo che purtroppo non ci da tregua e nell’attesa di rimettere Dreamer in acqua, ho deciso di ri-smontare le corsie di teak dove scorrono le protezioni del tambucio e le maniglie. Con gli anni..circa 30..il teak delle corsie del tambucio si era ormai ridotto in maniera preoccupante non garantendo piu’ una sicura tenuta.
Grazie A Piero..il mio mentore in fatto di teak e lavori sul legno, abbiamo ricostruito  i due pezzi, tali e quali, ma molto piu’ robusti e sopratutto piu’ affidabili.
Pensate che  i tientibene erano inseriti nel Teak con e due “spine “di legno e un po’ di silicone…. ahi ahi ahi.

The weather unfortunately does not give us the sun and warm.. so waiting to put Dreamer in the water, I decided to disassemble  teak lanesl where the  washboards run included the handrails. Over the years .. about 30 .. the teak lanes of the companionway  had been reduced at an alarming rate not more than ensuring safe washboard “keeping”..in bad weather.
Thanks to Piero .. my mentor guru of teak , we have reconstructed the two pieces, as they are, but much more strong and reliable.
Incredible… that the original handrails were attached to the Teak  with “thorns” of wood and a little silicon …. ouch ouch ouch.Dangerousss!!!

t


Lavori sul timone – Works on the rudder

Ciao… A tutti ecco a Voi i Lavori sul timone!!
Sto ultimando i lavori sul timone di Dreamer, come potete vedere dalle foto che ho postato ho deciso di irrobustire il timone aumentando la dimensione delle guance d’acciaio che tengono la barra nuova di teak. I fori originali delle viti passanti delle guance permettevano all’acqua di entrare con il rischio di un indebolimento completo della struttura, infatti questo è un problema spesso presente nei timoni dei folkboat  Marieholm, e purtroppo il mio non ne era completamente esente. Per evitare il peggio (dopo aver ben asciugato il timone lasciandolo un paio di mesi dentro il locale caldaia di casa..) ho resinato tutti i fori compresi i 2 nuovi  e  ri-forati.(.. che fatica ..il timone è duro come l’acciaio..e infatti di acciaio dentro ne ha parecchio). ho grattato la vecchia vernice stuccato il tutto e ho dato 2 mani di primer epossidico manca solo dare l’ultima grattata e poi via allo spruzzo con il colore originale… YO!!!!

UN GRAZIE IMMENSO A RAIMONDO E ANDREA DELLA RIBA (specializzata nel taglio laser e lavorazioni  di acciai) che hanno riprodotto esattamente le particolari viti e le placche d’acciaio del timone.Senza il loro supporto e pazienza questa modifica non sarebbe stata possibile. GRAZIE MILLE!!

Hello … To all of you here to the work on the rudder!
I’m finishing work on the Dreamer rudder , as you can see from the pictures I posted, I decided to strengthen the rudder increasing the size of the steel plates  that hold the new tiller made by teak. The original holes in the rudder allow water to enter with the full risk of a weakening of the structure, in fact this is often a problem present in the rudders of folkboat Marieholm, and unfortunately I was not completely free. To avoid the worst (well dried after leaving the helm a couple of months in the boiler room of the house ..) I have resin all the holes including the 2 new and re-drilled. (.. Struggling .. the rudder is hard such as stainless steel inside). I scraped the old paint  and I gave 2 coats of epoxy primer  and rudder willl be ready to be spray with original color. YO!!

A HUGE THANK YOU TO  RAIMONDO AND ANDREA OF  RIBA (specializing in laser cutting and steel) that have exactly reproduced the special screws and steel rudder plates .Without their support and patience this change would not have been possible. THANK YOU VERY MUCH!

Vecchi fori – Old holes

New screw handmade by 316L screw original was bronze.

New Steel plate

Old and New

Andrea Drilling Helm..hard!!!!!

Primer 2 hand…